Changing the range of a torque wrench.  Angular use. Adjustment correction when using torque-wrench extensions.

This article explains how to use an ‘extension’ for the purpose of convenience (perhaps a hex or 12 point socket or an allen wrench or other tool won’t fit at the end of a torque wrench where you need it); or, perhaps you want to increase the range of a torque wrench.

This article explains how to use an extension for such as the Airheads U-joint flange bolts, where you simply cannot get a torque wrench without an extension to fit properly, due to the limited room between the bolt and the U-joint body.

Another usage might be that if you only have a 75 ftlb maximum indication torque wrench and need to tighten the wheel bolts on your Paralever bike to 105 ftlbs,  ….you can do it with an extension, and this article explains it.

You must be a member to view complete articles on this website. If you are already a member, you can log in here. If you aren’t a member yet, you can purchase a membership here.

Continue readingMore Tag
Open post

Explaining the Slashes

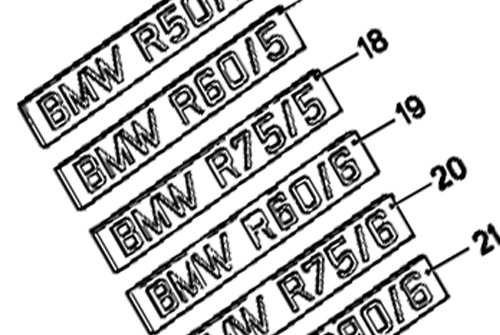
Can someone please explain the difference between a /2, /5, /6, /7 (is there a /8?), and what exactly is an “oil-head” and a “k” bike? And what are these Earle forks that everyone speaks so reverently about?

OK, this is off the top of my head, so it may contain some errors.

2 = second version of some of the Earles fork bikes. The designation is often used incorrectly for all Earles fork twins. Not all were designated /2. Updated normal 500cc bikes beginning ca. 1960 were designated /2. The Earles fork is a swinging arm design, superior for sidecar rigs and off road applications, very plush riding, but a little heavy steering as a solo setup. They do not nosedive under braking, in fact they tend to rise in the front as the bike comes to a stop under heavy braking. These machines have very stout frames with sidecar bosses built in. The fork has adjustable geometry to accomodate the sidehack. The bikes were produced from 1955 – 1969. They came in normal and high performance versions of the horizontally opposed twin displacing either 500 or 600 cc. R50 and R60 designated normal performance. R50S, R69 and R69S are high performance models, the R69S making 42 HP and exceeding 110 mph. Despite the nomenclature, R69 models still displaced 600 cc, go figure…. 1969 models were shipped with either the Earles or a telescopic fork the same fork as the /5 series built from 1970-73. They were designated “US”. So an R69 US was a high perfomance 600 cc with a telescopic fork. There is also a 250 cc bike, this was a vertical single cylinder engine, uncommon in the US due to its lack of performance.

The remainder of this article is only available for Airheads Beemer Club members. Please login or purchase a membership here to join the Airheads Beemer Club, after which you will enjoy access this article and all members only content of the ABC web site.

Continue readingMore Tag
Open post

Leaky Bing Carburetors

It is very important to turn off the petcock(s) when you park your bike. This is so even if you have a late model Airhead that has the fuel-shutoff solenoid valve located on the inside of the cover over the starter motor (many have been removed, but the same caution applies). It is exceptionally important if you park your bike in a garage where there is a source of gasoline fumes ignition …such as a water heater, ETC. We do NOT need to hear about BOOOOOM! We don’t want fires, either!

Bing carburetors are commonly known to leak in several ways. The most common is fuel dumping on your boot from a grossly overflowing carburetor, typically from a side vent. Sometimes there is just a slow weeping or a slow leak from the very small hole in the bottom of the float bowl.

Continue readingMore Tag
Open post

Deer Whistles

Hearing Sensitivity in White-tailed Deer

Ken Risenhoover, Jon Hunter, Roy Jacobson, and Glenn Stout

Although white-tailed deer (Odocoileus virginianus) vocalizations have been recorded and described, virtually nothing is known about “audition” or the range of hearing by deer and other ungulates. To address this need, I conducted some controlled experiments in collaboration with Dr. Jon Hunter at the College of Veterinary Medicine at Texas A&M University. Audiograms were determined for 5 bottle-raised adult white-tailed deer (3 males, 2 females). While anesthesticized, deer brainstem evoked potentials were recorded from the frontal sinus, vertex, and dorsal border of the zygomatic arch. 


Stimuli consisted of 45-ms pure-tone pips (2 ms rise and fall time) from a McNaural SM-400 amplifier connected to a Nicolet Biomedical Instruments “Pathfinder II” and were delivered using Amplivox audiocup earphones held against the deers ears. Evoked potentials were recorded at intensity levels of up to 95 dB for frequencies of 0.5, 1, 2, 4, 6, 8, 12 and 16 Khz. Estimates of thresholds of hearing sensitivity for each frequency were based on averages for 1000 recorded responses.

You must be a member to view complete articles on this website. If you are already a member, you can log in here. If you aren’t a member yet, you can purchase a membership here.

Continue readingMore Tag
Open post

Sidecars

This article was originally intended to be a series of articles on sidecars and sidecaring.  I decided not to do multiple articles.  I update this article now and then, date of which is at the end area.

When reading this article, you will see that I have included a considerable amount of my own travails in building my first street-going sidecar rig. I was exceptionally anal about building it to be very strong and reliable with very good handling.  YOU can take advantage of all my work, GREATLY simplifying YOUR work, by reading carefully, and referring to the Author’s website articles on sidecaring, which have many photos and technical details & descriptions not in what you are now reading.  You can save a LOT of time and cost.  There are also articles on how to drive a sidecar rig, and many hints and things to know.  http://bmwmotorcycletech.info/index.html

Snowbum
………………………………………………………………………………………………………………………………………………………………………………………………………

In my earliest Airhead days, I wrenched-on & raced sidecars: BMW /2 and some on the /5 bikes. I won’t go much further here into my track or dirt racing (2 and 3 wheels, BMW, Norton, Vincent). For sidecar racing, during and after my initial position as Wrench, I was often the ‘monkey’ on the platform.   Eventually I became the driver. Back then, I NEVER did any sidecar driving on the street. Over the many years since, I became more interested in street type sidecar rigs, but did nothing, besides attending many sidecar rallies; in particular, the one held in Griffith Park, Los Angeles area.  I was always there on 2-wheels….at least until the turn of the century.
 
In 2000 I drove a few miles in the countryside on Hal Thompson’s factory Ural rig and found it lots of fun, although I felt awkward (my lack of recent experience no doubt), and it felt very tall, no doubt due to the fact that a racing sidecar rig is VERY low to the ground. I began thinking more seriously about building a rig to compliment whatever solo bikes I had.  There were other reasons too… I’d been suffering for years with back deterioration; and thought then, that the handwriting was on the wall for my dirt riding, let alone solo road riding.  I also wanted something ‘different.’ After 850K or so on motorcycles I was occasionally bored. I had some adventure touring in mind and thought that now might well be the time to have a sidecar outfit for myself.  Serious attention to back exercises has since kept the deterioration of my back to a minimum, although still troublesome. I can’t see myself giving up two wheel riding, not hardly, not until maybe in my eighties. But the idea of a sidecar rig WAS…and REMAINED… very appealing.  

In 2001 I built a sidecar rig for the street, an R100RT-Ural rig. It was very stoutly built.   I had it for quite some time. Some years later I purchased a rig and modified it extensively to my particular tasts, and I still have that one, a K1100LT-EML rig, with EZS tug equipment. I used both rigs on the street, occasionally hard-pack dirt roads, and sometimes drove them on ice and snow, and I have put a lot of long distance touring miles on the K bike rig, with my wife sometimes in the chair.  Over the years I have worked on a lot of street-going sidecar rigs that belonged to other folks.  I have seen some good rigs, and some awful rigs.  Sidecars need to be built Hell-For-Stout; and with real thought put into the over-all design.  They also absolutely must be aligned correctly, which is easier said than done.

Sidecar rigs are also known as ‘Outfits,’ ‘Combinations,’ Gespanne, and ‘Hack-Rigs’. The sidecar itself has had many names, including Hack and Chair.  Rigs are a lot of fun, & often attract a lot of attention from folks who would never think nice thoughts about motorcycles and motorcyclists. They can also be a PITA to learn to drive. They do NOT handle like cars, nor trikes, nor motorcycles. They change their handling characteristics in accelerating, and in braking, and handle totally differently on right turns than left turns. They are affected seriously by the changing crown of the road. They are more difficult, in some ways, to ‘drive’ really well, than riding a motorcycle; and can be more physically demanding….or, at least tiring. But, they are a lot of fun!   They are also one of the better answers for those who want to be ‘in the wind’ but have physical limitations.   Sidecars are NOT, however, just for ‘old guys’.  Sidecars allow you to ‘motorcycle’ even in the Winter.  They can carry a LOT, and even a single wheel drive sidecar rig can be usable on ice and snow.

You must be a member to view complete articles on this website. If you are already a member, you can log in here. If you aren’t a member yet, you can purchase a membership here.

Continue readingMore Tag
Open post

Primer on Using Heli Coil® Inserts

DISCLAIMER: About a week ago I responded to a thread on the Airheads list dealing with the repair of a stud that had stripped out the thread. Someone mentioned that the information should be made available to others and asked if I would write up some of the do’s and don’ts of installing Heli Coil® inserts. I guess I do have a vested interest in that I sell Heli Coil® products in the Upper Mid-Western States but my purpose in writing up these comments is purely educational. Please contact your local sources for these products; I am available for questions. Please note that Heli Coil® is a registered trademark of the Emhart Corporation.

BACKGROUND: Heli Coil® inserts are made from 18-8 stainless wire, have a diamond cross section with a hardness of Rc 43-50, an ultimate tensile strength of from 200kpsi to 250kpsi and a surface finish of between 8 and 16 microinches. The final product is larger in diameter than the tapped hole. During installation the insertion tool applies torque to the insert reducing the diameter of the leading coil allowing it to enter the tapped hole. After installation the insert expands outwards with a spring force that permanently anchors the insert in place. The product was invented in the late 1930’s to provide a solution for the repair of aircraft engines, especially the threads to attach spark plugs and ‘jugs’. The stainless steel insert has a temperature range of from -320F to +800F.

SIZES, TYPES & MATERIALS: There are two designs; the STANDARD which has a free-running thread and the SCREW-LOCK which provides a locking torque on the mating fastener using “chords” on one or more coils of the insert. Available sizes are from #2 to 1 ½ inches in both UNC and UNF threads (each size has 5 different lengths available) and metric M2.2 to M39 in both coarse and fine threads (5 different lengths). Inserts are normally made from 18-8 stainless but other materials are available on special order. Lengths of inserts are referred to in diameters. A ¼-20 insert that is 0.250 long is a 1-diameter insert. (NOTE: Free state measurements of an insert are not valid due to the ‘spring’ nature of the parts.)

You must be a member to view complete articles on this website. If you are already a member, you can log in here. If you aren’t a member yet, you can purchase a membership here.

Continue readingMore Tag
Open post

Hydraulic Jacks

Above are two inexpensive ‘bottle jacks’.  A 12 inch tall ‘square’ is in the center of the photograph, and a 12 inch ruler below to give you an idea of size. These two jacks happen to be the versatile types that have tops that screw-down into the jack pistons and those jack pistons are shown with jack pressure released, that is, down.

Making an anvil if your jack does not have a particularly useful one, as in the photo, can be simply made from a piece of iron pipe, cut with a hacksaw to make a half round length. This can be much nicer than the bent metal type in the right side of the above photo that I made in a couple of minutes.  The hacksaw-cut type is also described in this article. The jack on the left has a top I made from aluminum stock.

Below is a photo of my small scissors jack. It is rated at 2 tons. I find this jack quite useful. I have made a curved cradle for the anvil top of this jack, as shown. As on my other jacks, the curved cradle is rotatable. This jack cost only a few dollars a bit more than the inexpensive bottle jack type I discuss in this article.  Note how small this floor jack is….and it is also not very tall.

You must be a member to view complete articles on this website. If you are already a member, you can log in here. If you aren’t a member yet, you can purchase a membership here.

Continue readingMore Tag
Open post

$4 Carburetor Synchronizer

Since joining the Airheads shortly after purchasing my first-ever Beemer in October of 2001, I’ve found the AirList to be an invaluable source of information and direct feedback as I learn my way around my new 1984 R100RS. One of the first things I do when acquainting myself with a new mount is a basic tune-up. Lurking on the Airlist provided a bunch of helpful tips to supplement (and correct) the tune-up info in the Haynes and Clymer manuals.

One of the slickest tune-up tips I came across was Tom Rowe’s mention of a ridiculously cheap and easy-to-build differential manometer (vacuum gauge) for balancing carburetors on vacuum port equipped Boxers. I’d read about the Twin-Max (aprx. $80) and have used the $40 CarbStix on my 4-cylinder Hondas, but for less than $4, I was able to build a twin carb synchronizer that is 16 times more sensitive than my mercury vacuum gauges and can be assembled from common materials available at almost any hardware store. I built it and my R100RS loved it – it really smoothed out some bands of footpeg/bar/mirror vibration that the bike had, even after using the CarbStix.

I posted a ‘Thank You’ note for the idea on the AirList after I tried it and got even more valuable feedback from Jay Carpenter and a request from John “Beetle” Mailleue, ABC# 5657 to write a tech article for the AirMail. After spending some more time in the garage incorporating Jay Carpenter’s ideas, I figured I’d go ahead and write-up a description of how to build and use the $4 Carb Synchronizer, because it REALLY works. Super cheap, super accurate, super easy to build and super easy to use – CLASSIC Airhead technology!

Credit for the original idea has to go to Marty Ignazito of the powered-parachute crowd, he came up with the idea to balance the twin Bings on a two-stroke Rotax and his original write-up is at www.powerchutes.com/manometer.asp. If you try this idea and like it, send Marty a thank-you e-mail at mdipe@mcleodusa.net.

Here’s the Materials List for the $4 Carb Synchronizer Tool:

20 feet of clear plastic (vinyl) tubing – inside diameter big enough to slip on the vacuum nipple of your carb (3/16″ i.d. worked for my bike, but it’s tight, maybe 1/4″ i.d. might be better). 15 cents per foot in the plumbing section at my local ‘big box’ hardware store, Sutherlands.
A yard stick – Home Depot sells an aluminum yardstick for under $2, but you can make a perfectly satisfactory gauge with a 3-foot piece of 1″ wooden lathe for next-to-nothing. (For a ‘professional’-looking gauge, I actually used a yellow aluminum 4-foot rule, but that was wretched excess at $5.)
3M/Scotch/Whatever – clear mailing/packaging tape. You should have some of this left over from the Christmas mailing season; otherwise around a $1 a small roll (and you won’t need much).
2 short nylon zip-ties – You should have these in your garage. If not, buy them in bulk for cheap in the wiring section of Home Depot, Sutherlands, Ace Hardware, etc. – you’ll use them and wonder why you didn’t have them before.
A tiny amount of automatic transmission fluid – Actually, just about any fluid works, including used motor oil, colored water, 2-stroke oil, etc. I chose ATF because I already had a gallon of it and (most important) it is really thin and is RED (which looks WAY cool as the indicator fluid against my fancy yellow ruler) and ATF won’t hurt the engine if it accidentally gets sucked in the carb’s vacuum port.   (ed. note: 90W Tranny fluid works well and because it’s thicker – it’s less likely to get sucked into the carb.)

Building the Balancer

Fold your 20′ of vinyl tubing in half and mark the center point. Lay your yardstick down flat on a convenient work surface (kitchen table or floor). Place the center point of the tubing at the bottom end of your yardstick (there is generally a hole at the top end of the yardstick – put the center-bend of your vinyl tubing at the opposite end of the yardstick from that hole). Carefully run the tubing up each side of the yardstick, making sure that the tubing makes a smooth, non-kinked bend at the bottom.

Use the clear packing/mailing tape to fasten the tubing in place on either side ( left and right ) of the yardstick. Thread the zip-ties through the hole at the top of the yardstick and snug the left and right side tubing to the respective sides of the ‘stick with the zip-ties. You should now be able to hang your yardstick from the hole in the top ( I use a bungee suspended from a hook in the garage ceiling). The tubing runs around the perimeter of the yardstick and about seven feet of tubing hangs down from the left and right sides of the ‘stick. I fold a piece of tape around each end of the tubing like a little flag and mark the left side with an “L” and the right side with an “R” using a magic marker.

Now, put one side of the tubing in the container of automatic transmission fluid and, using the other side of the tubing like a drinking straw, suck ATF fluid about three feet up into the tubing. Maintaining suction for a second, pull the tubing out of the ATF container and then raise BOTH ends of the tubing above the top of the yard stick. Temporarily fasten both ends of the tubing high enough that the ATF drains down to the loop at the bottom of the yardstick. I recommend leaving it overnight so that all the bubbles, etc. work their way out.

You must be a member to view complete articles on this website. If you are already a member, you can log in here. If you aren’t a member yet, you can purchase a membership here.

Continue readingMore Tag

Posts navigation

1 2 3 4 5 6 7 14 15 16
Scroll to top